How to Upload a L4d2 Mod to the Steam Workshop
Contents
- 1 Introduction
- 1.1 Workshop modernistic files and directories layout
- 1.2 Preparing mod for uploading step by step
- i.3 Supporting specify version of the game
- 2 Uploading
- 2.1 Validation
- 2.2 Success
- 3 Steam Workshop Terms Of Service
Introduction
In this tutorial, we will show you lot how to set your mod for uploading it to the workshop pace by step.
Workshop modern files and directories layout
Outset of all - the layout of your mod will change a lilliputian flake. To bank check the Steam Workshop mods structure click here.
Preparing mod for uploading pace by step
| 1 | 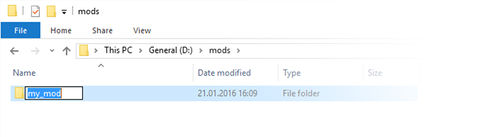 | First step of preparing your modernistic is creating of the folder. You will put there all the files and folders needed for your modern to be uniform with Steam Workshop. |
| 2 | 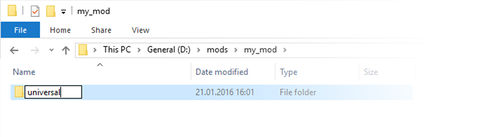 | Afterward creating of the folder open information technology and create some other folder inside called universal. (Instead of folder y'all tin also create ZIP archives with game information) |
| three | 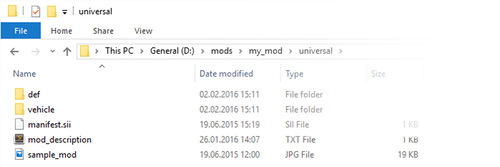 | The universal directory (or archive) should comprise all the standard mod parcel content and so: manifest.sii file, description file, icon file and the mod content. Note: Remember! In Workshop mods manifest.sii, clarification and icon files are required! Observe more than info here |
| iv | 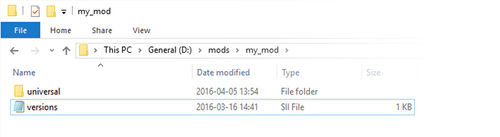 | Open your favorite text editor and create file called versions.sii - save it in the same folder where yous created universal binder |
| 5 | 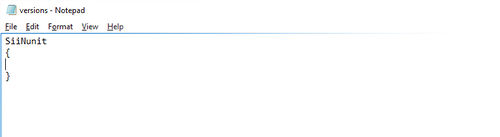 | Add sii file frame to your versions.sii file. SiiNunit { } |
| 6 | 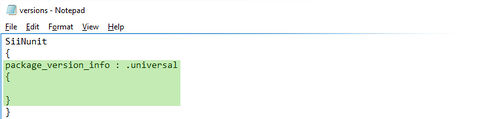 | Add definition of universal version unit. SiiNunit { package_version_info : .universal { } } |
| vii | 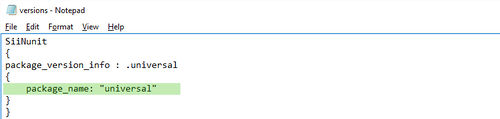 | Fix package_name to name of the folder or Zip annal with the mod data. SiiNunit { package_version_info : .universal { package_name: "universal" } } |
When you practise those points and put your game content to parcel you and you don't want to support exact game updates you tin skip adjacent points and become to Uploading part.
Supporting specify version of the game
| ane | 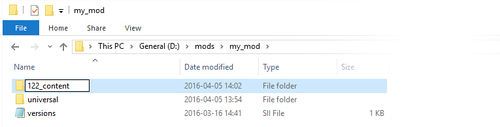 | In case you take data that supports one verbal game version you lot need to create folder or annal where you will store the content. TIP: For ameliorate organization of the directories. We recommend to call this binder 122_content - 122 stands for 1.22. For example - for 1.23 update information technology volition exist 123, for 1.6 it will be 16, etc. |
| 2 | 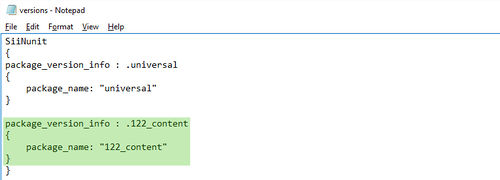 | Open your text editor and do exactly the same steps as you did while adding a definition for the universal version of your mod (besides using a different folder and unit name this time). SiiNunit { package_version_info : .universal { package_name: "universal" } package_version_info : .122_content { package_name: "122_content" } } |
| 3 | 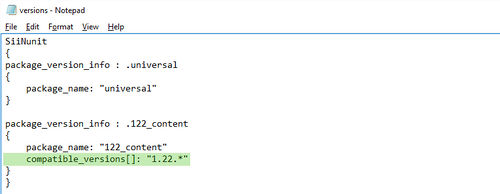 | Now in that location are some more steps you will need to go through: Set the value of the compatible_versions aspect. Every bit we want to have data for one.22 update write "ane.22.*". Values are similar to compatible_versions array in manifest.sii. If you want to use this package for version 1.23 merely you need to write: compatible_versions: "1.23.*" If y'all want to support merely i version (non recommended) you will write: compatible_versions[]: "1.22.1" The value of this aspect can contain numbers, dots "." (between numbers) and asterisk "*" (at the end). If you just write "1.35.1" your modernistic volition simply exist uniform with this specific version. The utilise of "1.35.*" will make your mod compatible with all small updates for version 1.35 (recommended). SiiNunit { package_version_info : .universal { package_name: "universal" } package_version_info : .122_content { package_name: "122_content" compatible_versions[]: "1.22.*" } } |
| 4 | 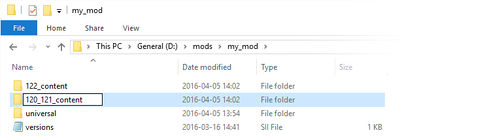 | In case you lot want to support more than one exact version yous need to setup folder for it. TIP: We recommend using similar syntax equally for unmarried version specify content, but for separating the versions utilise underscore "_". For example, if the content will be used by both ane.23 and ane.24 content package will be chosen: "123_124_content" in case you desire the content bundle to be used for ane.24, 1.25.0 and 1.25.2 updates the content package will be called "124_1250_1252_content". |
| 5 | 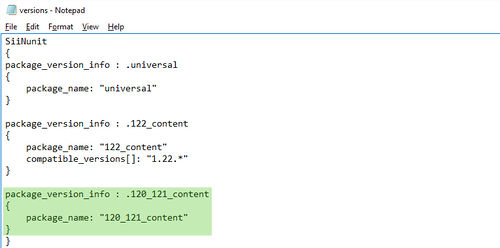 | Add over again the same definition for the unit of measurement. SiiNunit { package_version_info : .universal { package_name: "universal" } package_version_info : .122_content { package_name: "122_content" compatible_versions[]: "one.22.*" } package_version_info : .120_121_content { package_name: "120_121_content" } } |
| 6 | 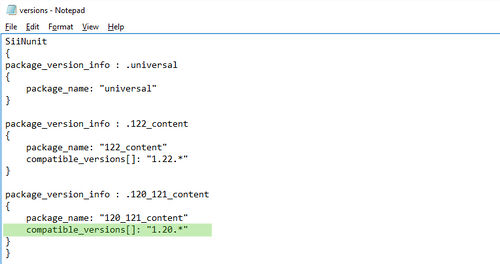 | Add together compatible_version value for i update yous support. SiiNunit { package_version_info : .universal { package_name: "universal" } package_version_info : .122_content { package_name: "122_content" compatible_versions[]: "1.22.*" } package_version_info : .120_121_content { package_name: "120_121_content" compatible_versions[]: "ane.xx.*" } } |
| 7 | 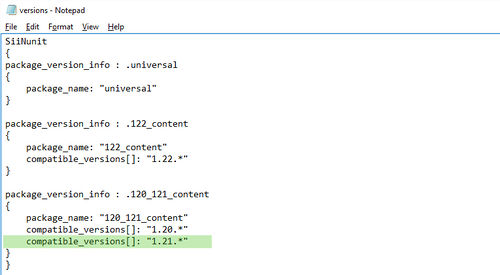 | And add together again compatible_version value for second update you want to back up. SiiNunit { package_version_info : .universal { package_name: "universal" } package_version_info : .122_content { package_name: "122_content" compatible_versions[]: "one.22.*" } package_version_info : .120_121_content { package_name: "120_121_content" compatible_versions[]: "1.20.*" compatible_versions[]: "1.21.*" } } |
Uploading
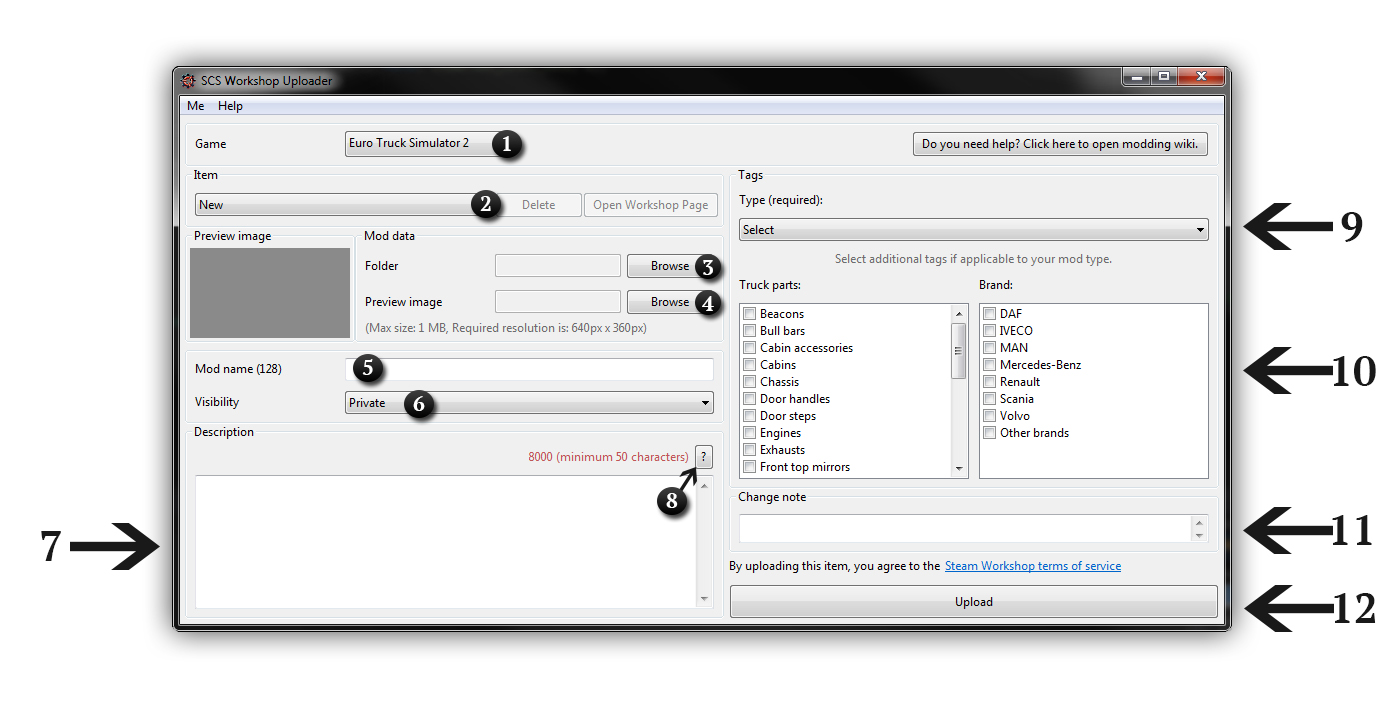
- Run SCS Workshop Uploader tool from your steam client.
- Select the game that is compatible with your modernistic.
- Select New from the dropdown. It should be selected by default when you launch the tool.
- In the Mod information section - scan for your mod data binder. This folder should include your packages and version.sii file.
- If you lot select folder, browse for mod preview image.
- In next step fill mod name.
- Select mod visibility in steam workshop. If it's Private, Friends only or Public.
- Fill your mod description which volition be shown in your item workshop page. (Minimum 50 characters)
- If y'all want to know formatting possibilities click on the question mark push.
- At present, you lot take to select type tag for your mod.
- You lot tin select truck parts and brand tag if appropriate.
- Yous can now fill change notation of your mod. If you demand to have the edit box bigger simply resize the tool window. As it's initial upload stride y'all will more than probable write nothing hither - or write something like "Initial upload.".
- If y'all did all the points simply click Upload button. Before the bodily upload functioning, the tool will check if your mod contains the correct information.
Note: You may detect that when you are using not ASCII characters the counters are decreasing past more than one. It is because those characters have a bigger size than one byte. The counters are counting bytes space used by description and title - not the grapheme count
Validation
- In case of whatsoever validation mistake yous will detect this dialog.
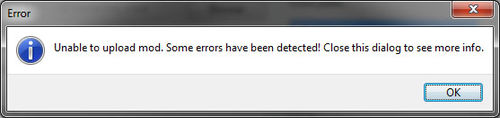
When you click OK you will see log dialog with all errors and warnings that occurred during validation. In case if yous have only warnings you lot can both continue or abort the functioning. In case of errors, y'all volition need to ready them before uploading.
Useful link: If you demand help with solving your validation errors click here
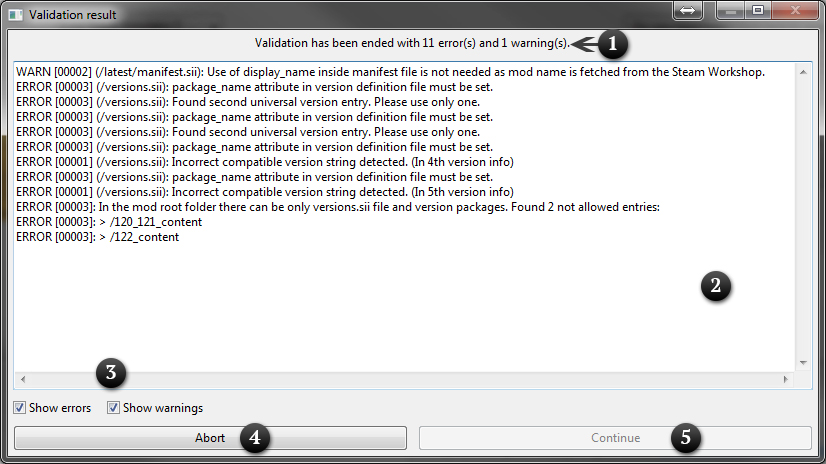
- In this line y'all have the summary of the validation - the number of errors and warnings.
- In this area you lot have log of the validation. All the log entires accept the following class: [TYPE] [CODE] (file): Message
- Bellow you have 2 checkboxes, yous tin can hide warnings or errors hither.
- In example there are is at to the lowest degree one error you are able to only click Arrest. This button simply aborts the upload.
- In case validation did not report whatsoever error you can click this button and go on uploading your mod. If in that location are errors y'all are unable to continue - you have to fix the problems.
Success
If there are no errors the upload will proceed and if everything goes right you will come across this dialog.
However it is possible that there was some failure while uploading - you volition so notice dialog with the error message. If y'all have some problem with resolving the problem write on our forum
Steam Workshop Terms Of Service
If it'south your first modern and you were not doing whatever mods for other game y'all will likely get an error about not accustomed Steam Workshop Terms Of Service - if so happens the tool will show you appropriate message and the steam workshop terms of service will be opened in your default spider web browser - you lot have to login to your Steam account read and accept the terms of service and if y'all do so simply become back to the tool and try once again with uploading your mod. It is mandatory to agree to these terms.
carbajaliggerstoost.blogspot.com
Source: https://modding.scssoft.com/wiki/Tutorials/SCS_Workshop_Uploader/How_to_upload_new_mod%3F
0 Response to "How to Upload a L4d2 Mod to the Steam Workshop"
Postar um comentário